

How to Sew a Dog Collar ?
of reading - words
Making your own dog collar is a rewarding DIY project that combines creativity, customization, and practicality. Whether you're looking to match your dog's personality with a unique pattern or want to create a backup collar in case of emergencies, knowing how to sew a dog collar can save money and give your pet something truly one-of-a-kind.
This guide will walk you through every step of sewing a dog collar—from choosing the right materials to assembling hardware and finishing the final product safely. Even if you’re new to sewing, you’ll find that making a collar is a manageable and satisfying project.
Why Make Your Own Dog Collar?
Store-bought collars are convenient, but they often lack individuality or precise fit. By learning how to sew a dog collar, you can:
-
Select high-quality, durable materials
-
Choose custom colors, prints, and hardware
-
Control the sizing for a perfect fit
-
Save money on specialty or designer collars
-
Practice sustainable pet care with handmade gear
Plus, homemade collars make thoughtful gifts for fellow dog lovers.
Materials You’ll Need
Before starting, gather these materials and tools:
-
Nylon or polyester webbing (3/4" or 1" width, depending on dog size)
-
Cotton fabric (optional, to wrap over webbing for design)
-
Matching thread
-
Contoured side-release buckle
-
D-ring (for leash attachment)
-
Adjustable tri-glide slide (for sizing)
-
Sewing machine
-
Pins or fabric clips
-
Scissors or rotary cutter
-
Measuring tape or ruler
-
Lighter or fray-check (for sealing nylon ends)
Measuring Your Dog
To determine the proper length, measure around your dog’s neck using a soft tape measure. Add 6 to 8 inches to this measurement to accommodate the folding, hardware, and adjustment room.
As a guideline:
-
Small dogs: 10–14 inches
-
Medium dogs: 14–20 inches
-
Large dogs: 18–26 inches
Ensure the width of your webbing is proportionate to your dog’s size. Larger dogs require wider, stronger collars for safety.
How to Sew a Dog Collar: Step-by-Step Instructions
Step 1: Cut the Webbing
Cut your webbing based on your dog’s neck size plus 6–8 inches. Use a lighter to slightly melt the ends to prevent fraying, or apply fray-check if you prefer.
If you're wrapping the webbing in cotton fabric for style, cut the fabric strip 2 inches wider and 2–3 inches longer than the webbing.
Step 2: Wrap with Fabric (Optional)
Fold the long edges of the cotton fabric inward to meet in the middle. Place the webbing inside and fold the fabric over it, securing it with pins or clips. Sew along both long edges to attach the fabric securely to the webbing.
Step 3: Attach the Tri-Glide Slide
Thread one end of the webbing through the tri-glide slide, loop it over the center bar, and sew it down using a strong square and X-box stitch. This allows for size adjustments later.
Step 4: Add the Side-Release Buckle
On the free end, thread the webbing through the male end of the side-release buckle, and then back through the tri-glide slide (to secure the adjustable loop). Next, thread the female end of the buckle on the opposite side, leaving about 2 inches of webbing for sewing.
Before sewing, slide the D-ring onto the webbing and position it near the female buckle end.
Sew the final end down using a reinforced X-box stitch. Be sure the D-ring is securely enclosed between your stitches and the buckle.
Step 5: Inspect and Test
Once sewn, inspect the collar thoroughly:
-
All stitching should be reinforced and secure
-
The D-ring should not slide or shift
-
The buckle should snap tightly
-
The tri-glide should adjust smoothly
Before using the collar, test its strength by tugging on all parts to make sure it holds.
A Word About Dog Collars
A dog collar is more than a fashion statement—it’s a vital safety tool. It holds your dog’s ID tag, connects to the leash, and can even aid in training. A well-fitted, sturdy collar helps you maintain control during walks, identify your dog if they’re lost, and provide comfort without irritation.
When making your own, always prioritize function over fashion. Strong stitching, quality hardware, and the correct fit are essential to your dog’s well-being.
If you're unsure whether your homemade collar is strong enough, use it as a backup or decorative collar and rely on a professional-grade collar for walking and training.
Frequently Asked Questions
What type of fabric is best for sewing a dog collar?
Use durable cotton fabric for aesthetic wraps, but always reinforce with strong nylon or polyester webbing for safety.
Can I make a collar without a sewing machine?
Technically yes, but hand-stitching isn’t recommended for strength and durability. A sewing machine provides stronger, more reliable seams.
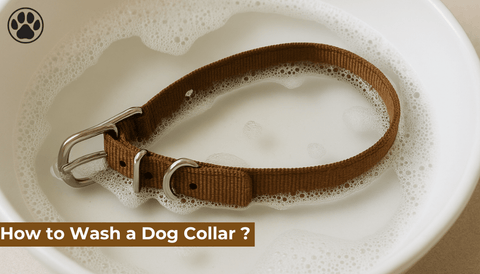
How do I wash a homemade dog collar?
Most collars made with cotton and nylon can be machine-washed in cold water inside a garment bag. Air dry to maintain shape.
Is it safe to sew a collar for a large dog?
Yes, as long as you use heavy-duty materials, strong stitching, and proper hardware. Test it thoroughly before use.
What’s the right width for my dog’s collar?
-
Small dogs: 5/8" or 3/4"
-
Medium dogs: 3/4" to 1"
-
Large dogs: 1" to 1.5"
Choose a width that distributes pressure without causing discomfort.