

How to Make a Dog Collar ?
of reading - words
Creating a dog collar from scratch can be a rewarding DIY project for pet owners. Not only does it allow for customization, but it also ensures your furry friend wears something made with love and attention to detail. In this comprehensive guide, we’ll explain how to make a dog collar, list essential materials, and guide you through each step for a safe, durable, and stylish result.
Why Make Your Own Dog Collar?
There are countless reasons to consider making a custom dog collar. Some owners want to express their dog’s personality, while others seek better control over materials used—especially for dogs with skin sensitivities. Additionally, homemade collars can be adjusted to perfectly fit your dog’s size and style preferences.
Materials You'll Need
To make a dog collar, you’ll need a few tools and components. Most are easy to find in craft stores or online:
-
Nylon webbing or cotton fabric (1" width recommended)
-
Side-release buckle (plastic or metal)
-
D-ring (for leash and tag attachment)
-
Tri-glide slide (for size adjustment)
-
Sewing machine (or heavy-duty needle and thread)
-
Scissors
-
Measuring tape
-
Lighter (for melting synthetic webbing ends)
-
Optional: Ribbon or decorative trim
Step 1: Measure Your Dog’s Neck
The first step in crafting a homemade dog collar is proper measurement. Wrap a soft tape around your dog’s neck, leaving about two fingers of space to ensure comfort. Add an extra inch or two for adjustment.
Step 2: Cut Your Webbing
Once you’ve measured the neck, cut your nylon webbing or fabric to the appropriate length. If you're using synthetic webbing, slightly melt the ends with a lighter to prevent fraying. For fabric collars, consider adding interfacing to increase durability.
Step 3: Add Decorative Trim
If you’d like to personalize your DIY dog collar, sew a strip of ribbon or printed fabric to the webbing. Make sure to use a strong, straight stitch, and run the seam down both long edges.
Step 4: Assemble the Hardware
Slide one end of the webbing through the male end of the side-release buckle, fold about 2 inches under, and stitch securely in place. Then thread the D-ring and tri-glide into position before attaching the other side of the buckle. The tri-glide will help with adjusting the collar length.
Step 5: Secure and Test the Stitching
Double-stitch all joints to ensure strength. You can use a box stitch (a square with an "X" in the middle) for extra reinforcement. Test by gently pulling the collar—if it holds firm, it’s ready.
Step 6: Fit and Adjust
Place the collar around your dog’s neck and adjust it using the tri-glide slide. Ensure it's snug but not tight, leaving space for comfort and movement. Attach your leash and test the collar during a walk.
Safety Considerations
When making your own dog collar, always prioritize your pet’s safety. Avoid small parts that could break or detach, and inspect the stitching regularly. Choose durable, non-toxic materials, especially if your dog has allergies or chews frequently.
Benefits of Handmade Collars
-
Customization: Pick your preferred colors, textures, and themes.
-
Comfort: Tailor the fit to your dog’s size and neck shape.
-
Affordability: Often more cost-effective than designer collars.
-
Craft Satisfaction: Enjoy a creative project with tangible results.
Explore Our Premium Dog Collar Collection
If DIY isn’t your style—or if you want a professional finish with premium materials—discover our exclusive Dog Collar Collection. Each design is crafted with quality, durability, and canine comfort in mind. From classic leather to modern reflective styles, you’ll find the perfect fit for your dog’s unique personality.
We also offer a curated selection of spiked, training, and designer collars, each combining function with fashion. Explore now and treat your pet to something truly special.
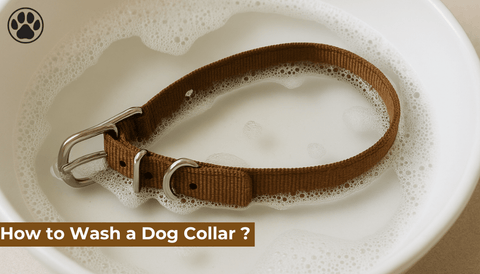
Caring for Your Dog Collar
Whether handmade or store-bought, regular cleaning is essential. Wash your collar by hand using mild detergent and water. Let it air dry thoroughly before reusing. Inspect the collar monthly for wear and tear to maintain safety.
Sustainable Choices
Consider eco-friendly materials like organic cotton, recycled polyester, or bamboo fiber webbing. These options are not only better for the planet but also safe for sensitive pups.
Tools You Can Use for More Efficiency
If you're planning to make multiple collars or want a more polished result, consider investing in:
-
Heavy-duty sewing machine
-
Industrial snap press
-
Heat transfer printer for personalization
FAQ: How to Make a Dog Collar
Can I make a dog collar without a sewing machine?
Yes, but you'll need strong hand-stitching skills and heavy-duty needles. Use a thimble and waxed thread for best results.
What’s the best material for a DIY collar?
Nylon webbing is durable and commonly used. Cotton is softer but may wear faster. For strength, use polyester or reinforced nylon.
Are homemade collars safe?
They can be if stitched properly and made with sturdy components. Always test the collar thoroughly before regular use.
How often should I replace my dog’s collar?
Inspect monthly. Replace it if you notice fraying, broken buckles, or poor fit.
Can I make matching leashes too?
Absolutely! You can use the same webbing and hardware to make a coordinating dog leash for a stylish set.